Impressum | Datenschutz | Shop | DIY | TT @ Twitter | TT-Cabs
Anzeigen der neuesten Beiträge

My SLO Clone Build

  • 58 Antworten
  • 30276 Aufrufe

0 Mitglieder und 1 Gast betrachten dieses Thema.

*

Offline FourT6and2

  • Full Member
  • ***
  • 46
My SLO Clone Build
« am: 26.06.2014 19:12 »
Hallo aus den USA! Dies ist meine vierte Verstärker zu bauen. Ich begann mit einem Fender Champ. Dann ein Marshall (Metro) Superlead, JCM800, und nun dies. Ich bin mit den Schaltplan aus C3-Amps, als auch die "PCB", Chassis und O'Netics Transformatoren.

Filterkondensatoren sind Panisonic.
Coupleing und Bypass-Kondensatoren sind Sprague 716p.
Widerstände sind Dale / Vishay.
Potentiometer sind Clarostat.

Genießen Sie!

*

Offline FourT6and2

  • Full Member
  • ***
  • 46
Re: My SLO Clone Build
« Antwort #1 am: 26.06.2014 19:14 »


*

Offline FourT6and2

  • Full Member
  • ***
  • 46
Re: My SLO Clone Build
« Antwort #2 am: 26.06.2014 19:15 »
Painting transformer end-bells.


*

Offline FourT6and2

  • Full Member
  • ***
  • 46
Re: My SLO Clone Build
« Antwort #3 am: 26.06.2014 19:17 »


Resistors. I have both Dale/Vishay (I think that's what they are) and PRP. I haven't decided which ones to use yet. But I have some options.


The same blue dipped/molded ceramic disk as used in the real SLO:


*

Offline FourT6and2

  • Full Member
  • ***
  • 46
Re: My SLO Clone Build
« Antwort #4 am: 26.06.2014 19:18 »
Power Board is populated.


*

Offline FourT6and2

  • Full Member
  • ***
  • 46
Re: My SLO Clone Build
« Antwort #5 am: 26.06.2014 19:25 »
Currently working on the preamp PCB. Lots of resistors to install!

*

Offline Dirk

  • Dirk M.
  • Administrator
  • YaBB God
  • *****
  • 12.925
  • 2T or not 2T
Re: My SLO Clone Build
« Antwort #6 am: 26.06.2014 19:52 »
Lots of resistors to install!
;D
Für Support und Produktanfragen bitte das offizielle Kontaktformular im Shop verwenden. PMs werden nicht beantwortet.

*

Offline Jürgen

  • YaBB God
  • *****
  • 402
Re: My SLO Clone Build
« Antwort #7 am: 26.06.2014 19:54 »
So müssen Lötstellen aussehen! Saubere Arbeit. Good Job!

Gruß, Jürgen

*

Offline FourT6and2

  • Full Member
  • ***
  • 46
Re: My SLO Clone Build
« Antwort #8 am: 26.06.2014 20:23 »
So müssen Lötstellen aussehen! Saubere Arbeit. Good Job!

Gruß, Jürgen

Thanks! Danke!

*

Offline Duesentrieb

  • YaBB God
  • *****
  • 5.810
Re: My SLO Clone Build
« Antwort #9 am: 26.06.2014 22:11 »
Hi Mike, awesome job so far and excellent pics

Olaf

*

Offline FourT6and2

  • Full Member
  • ***
  • 46
Re: My SLO Clone Build
« Antwort #10 am: 26.06.2014 23:09 »
Hi Mike, awesome job so far and excellent pics

Olaf

Thanks, Olaf :)

And thanks for all the help with research.

*

Offline FourT6and2

  • Full Member
  • ***
  • 46
Re: My SLO Clone Build
« Antwort #11 am: 28.06.2014 10:46 »
Made some progress today. Preamp board is mostly finished. I just have a few small bugs to work out like the wrong wattage on two resistors in the power section and still need to install some jumpers. Also missing a ceramic disk cap.


Test fitting the boards in the chassis:


*

Offline FourT6and2

  • Full Member
  • ***
  • 46
Re: My SLO Clone Build
« Antwort #12 am: 28.06.2014 10:47 »
Installed most of the rest of the chassis stuff (except for the pots, still have to cut the shafts to length):


One issue I've run into is this corner of the PCB board. The stand-off mounting hole in the corner of the board is too close to one of the F&T caps. So I can't get the nut on. I'm trying to figure out a way around this. There is another hole in the PCB to mount the cap a little farther away from the stand-off mount. But that would require me unsoldering the cap, cleaning up the solder/flux, rebending the cap leads and re-soldering.


*

Offline FourT6and2

  • Full Member
  • ***
  • 46
Re: My SLO Clone Build
« Antwort #13 am: 29.06.2014 18:19 »
Removed the powder coat around the switches and pots for chassis-ground. Was a lot harder than I thought. Wound up using a Dremel. White powder EVERYWHERE. Should have worn a mask :)


*

Offline FourT6and2

  • Full Member
  • ***
  • 46
Re: My SLO Clone Build
« Antwort #14 am: 29.06.2014 23:26 »
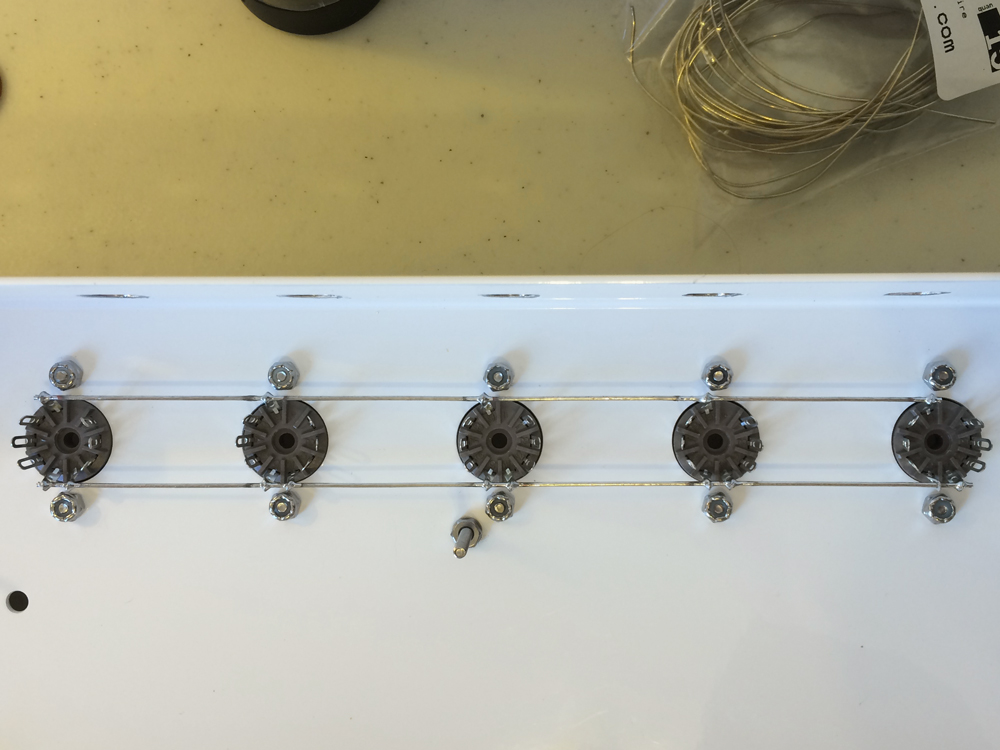
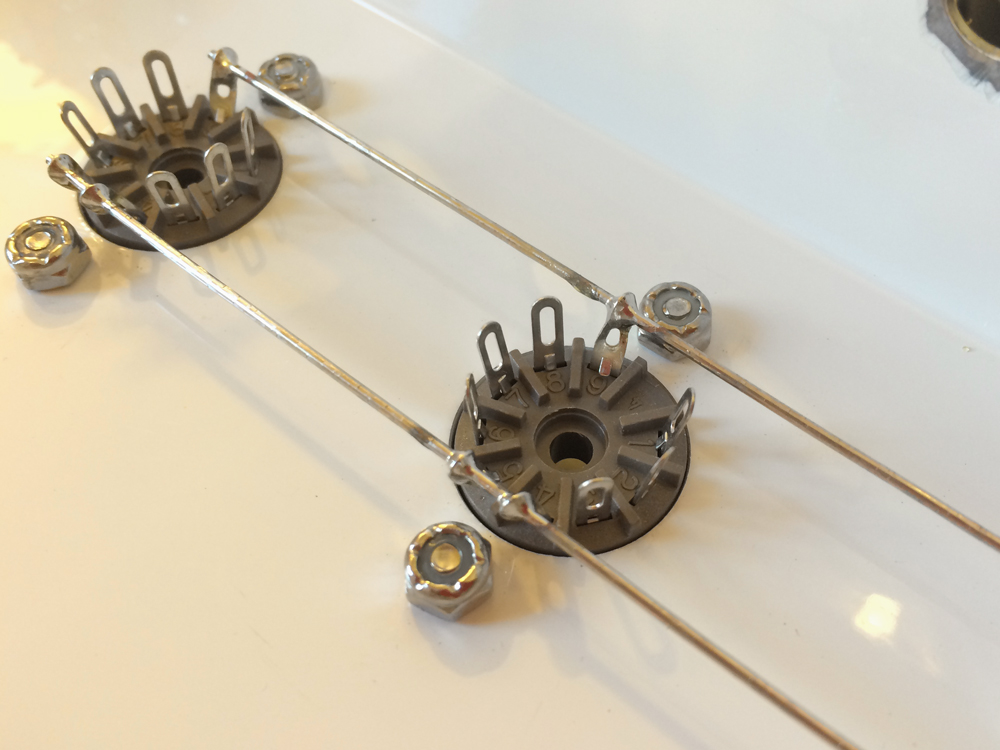
Ok, on to the preamp heaters. Usually wiring up heaters is my least favorite part of building an amp. It's a pain in the ass. The normal way, I'll just throw some wire into the chuck of a drill and twist away. Then cut lengths as needed and bend and wire and weave it all together. Easier than doing it by hand, but still torture.

I was actually looking forward to doing the heaters on this build, though. Just some straight wire and you're done! Love it :)

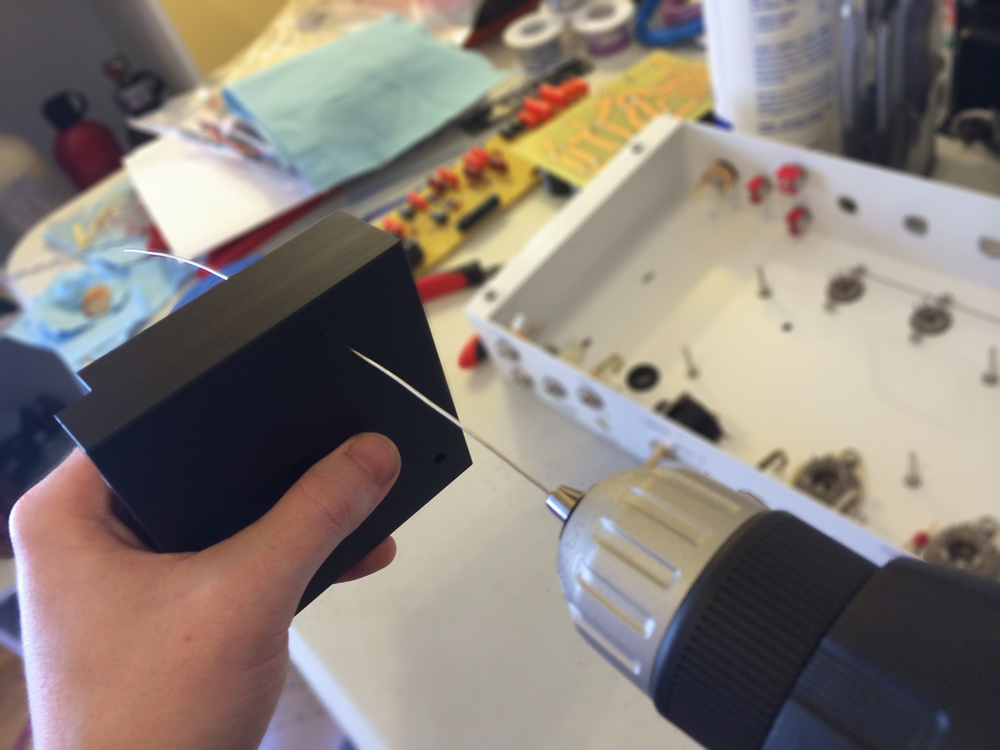
If you've ever wondered how to get straight bus wire, this is how I decided to do it. I used an armorer's block that I use to strip down my 1911 and drilled an 18-20 AWG hole thru it. Then I put one end of the wire in a drill and "extrude" it through the block while the drill rotates. I move the block back and forth slowly and carefully until the wire is as straight as I can get it and/or until I get super bored. Then I'll roll the wire under a wine bottle on a flat counter a bit for good measure. Seems to do the trick. Just takes a while.